Sometimes I want to send something in a shoebox I pack for Samaritain's Purse's Operation Christmas Child, but have a hard time figuring out how to get it to fit in the shoebox. So, I thought I'd share ideas and tips I've learned in this series of posts about making it fit in an OCC shoebox. So today, I'll share about fitting puzzles in boxes.
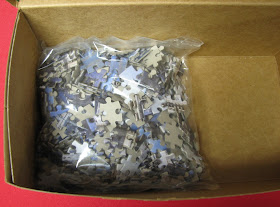
The first thought might just be to open the puzzle box, take out the bag of pieces,
and put it in the OCC shoebox...
and put it in the OCC shoebox...
...however, then the child has nothing to store the puzzle in...not to mention not knowing what it's supposed to look like! And, having just built a puzzle with family members this month with no image, let me tell you, it's not easy! LOL!
To address that issue, this is what I do now, I put the pieces in a bag with the image of the puzzle from the box (or if it's a box with multiple puzzles, the image of the particular puzzle it is). If the image is too large to fit in the shoebox, you can often either fold it over, find a smaller image on the box, or take a photo/scan of the box and print it out to include either smaller, or on paper that folds better. Sometimes I use zippered plastic bags, and use packing tape to attach the image to the front.
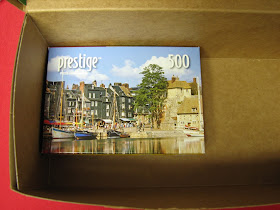
Sometimes the puzzle box is small enough to fit in the Operation Christmas Child shoebox, but still takes up a lot of room, and with the amount of items I want to get in, that can be an issues.
Obviously, you can do the hint above-cut apart box and add image. Or you can keep the box and add more things into it! I found the puzzle takes even less room if you build it first, then put it in the bag in chunks of pieces-plus this helps explain the idea to the child if they've never had a puzzle before.
One of the puzzles in the image at the start of this post was kind of like a floor mat-interchangeable squares. I just split it into three strips, and it fit in the box great. Didn't really feel a need to include an image with this one.
We received this donation of cut board puzzles, but they were too large to fit in the shoebox. We realized they could be built without the board base, so we got rid of the cardboard base, scanned the puzzle built, then put the pieces and a print out of the image of the puzzle built in these cute & matching ☺ bags! If you'd like to make small bags like this, we have instructions for similar ones here and here.
I even did something similar with 3d foam puzzles. I found a great deal on this foam bath puzzle set, but it was FAR too big to fit in a shoebox, plus had liquid in it. I found I could easily pop the pieces out and split it up into 6 sets. I took photos of them built and how to build them, printed out little pictures and put them in little zippered plastic bags...this one had a few little bonus items in it, too!
If you are looking for more tips for packing check out our series of Tips for Packing Operation Christmas Child Shoeboxes.


I love that ba. The idea of using wide ribbon for the casing is fantastic. I have so much I don't use.
ReplyDelete